
We strongly believe that getting hands-on and enhancing your living space with this DIY Home Decor Ideas for Small Spaces can have a profoundly positive impact, providing a welcome escape from the stresses of daily life while nurturing your creative side.
In this article, we’ll show you how to maximize the potential of small spaces in your home, offering budget-friendly DIY solutions.
Also we’ll guide you through ingenious ideas and practical solutions to transform those tiny spaces into functional and aesthetically pleasing areas.
Related reading “The Perfect Small Desk for Your Bedroom You’ll Love” and “7 Scandinavian Design Furniture Pieces We Love”.
3 DIY Home Decor Ideas: Elements to Bring Life to a Small Corner
Introducing three simple and budget-friendly DIY ideas to enhance your small space with style.
1- DIY Wicker Mirror:
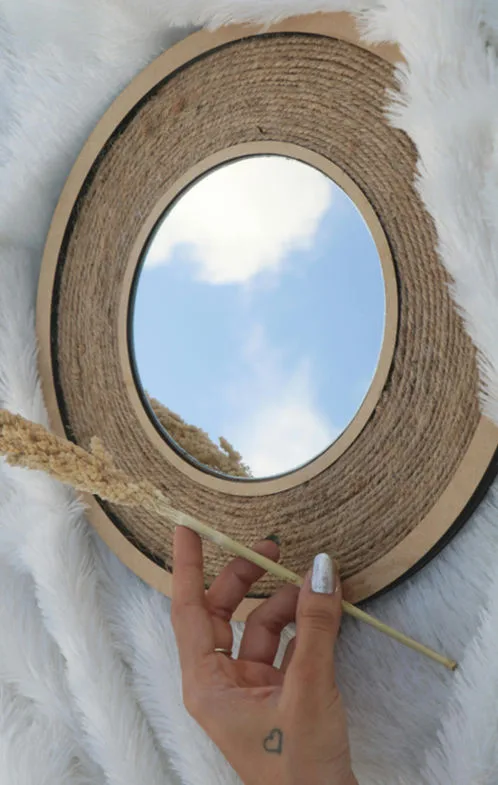
Hanging mirrors on the wall in small spaces offers numerous benefits.
They create the illusion of a larger space by reflecting light and surroundings, brightening up the room and making it feel more spacious.
To make a small round mirror with a circular wicker border, follow these steps:
Materials Needed:
- Small round mirror
- Wicker or rattan trim
- Hot glue gun and glue sticks
- Scissors
- Marker or pencil
- Measuring tape
Instructions:
- Measure the diameter of your small round mirror and add a few inches to determine the size of the wicker border you’ll need. This extra length will allow for overlapping and securing the wicker around the mirror.
- Using the measuring tape and marker, mark the desired length on the wicker trim. Make sure to mark it at multiple points along the trim for accuracy.
- Carefully cut the wicker trim along the marked line using scissors. Take your time to ensure a clean and even cut.
- Once you have the wicker trim cut to size, apply a line of hot glue along the edge of the mirror where you want to attach the wicker border.
- Quickly but carefully press the wicker trim onto the hot glue, starting from one point and working your way around the mirror. Make sure the wicker is securely attached and lies flat against the mirror’s edge.
- Continue applying hot glue and pressing the wicker trim until you have completed the circular border around the entire mirror.
- Once the wicker border is in place, trim any excess wicker with scissors to ensure a neat finish.
- Allow the hot glue to fully dry and set according to the manufacturer’s instructions before hanging or displaying your newly crafted wicker-bordered mirror.
- Optionally, you can add a hanging mechanism to the back of the mirror if you wish to hang it on a wall.
- Enjoy your unique and charming small round mirror with a stylish wicker border!
Remember to handle the hot glue gun with care to avoid burns, and be patient when attaching the wicker trim to ensure a professional-looking finish.
2- Homemade Candles:
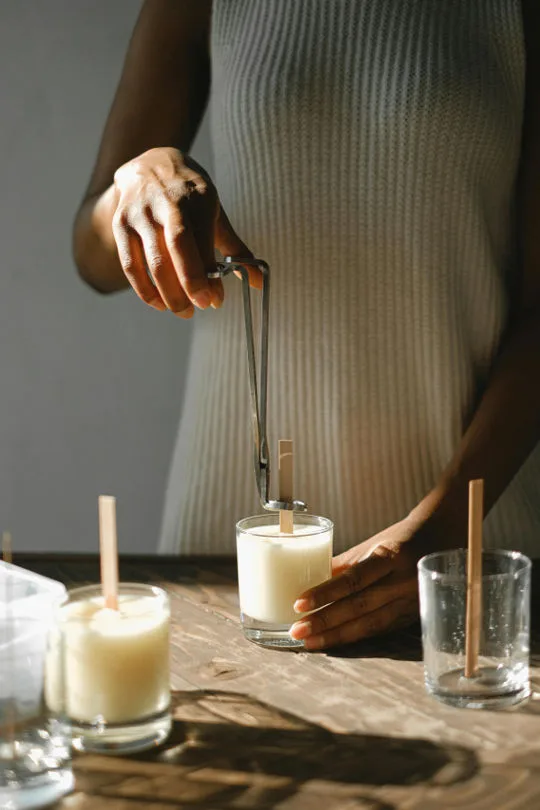
Homemade candles can serve as decorative accents, adding warmth and charm to any room while serving a functional purpose.
DIY candles also allow for customization in terms of scent, color, and design, enabling individuals to create a personalized ambiance that suits their preferences and complements the decor.
To make homemade candles, follow these steps:
Materials Needed:
- Wax (such as soy wax, beeswax, or paraffin wax)
- Candle wicks
- Heat-resistant containers (e.g., jars, tins)
- Essential oils or fragrance oils (optional)
- Candle dye (optional)
- Double boiler or a heat-proof container and saucepan
- Stirring utensil (e.g., wooden spoon)
- Thermometer
Instructions:
- Prepare your containers by ensuring they are clean and dry. Place a candle wick in each container, securing it in the center using a wick holder or adhesive at the bottom.
- Melt the wax using a double boiler or a heat-proof container placed in a saucepan filled with water. Heat the water to a gentle simmer and place the wax in the container, stirring occasionally until fully melted. Use a thermometer to monitor the temperature, ensuring it does not exceed the recommended melting point for the type of wax you are using.
- If desired, add fragrance oils or essential oils to the melted wax to create scented candles. Stir well to ensure the fragrance is evenly distributed throughout the wax.
- Optionally, add candle dye to the melted wax to achieve the desired color. Use a small amount at a time, as the color may intensify once the wax solidifies. Stir thoroughly until the dye is completely incorporated.
- Once the wax is fully melted and any additives are mixed in, carefully pour the wax into the prepared containers, ensuring the wicks remain centered. Leave some space at the top to avoid overflowing when the candle solidifies.
- Allow the candles to cool and solidify completely, which may take several hours depending on the size of the candles and the type of wax used.
- Trim the wicks to about ¼ inch (6 mm) above the surface of the wax once the candles have cooled and hardened.
- Your homemade candles are now ready to use! Light them up and enjoy the warm, soothing glow and delightful fragrance they provide.
Experiment with different wax types, fragrances, and colors to create unique homemade candles that suit your preferences and style.
3- Embroidered Pillow Covers:
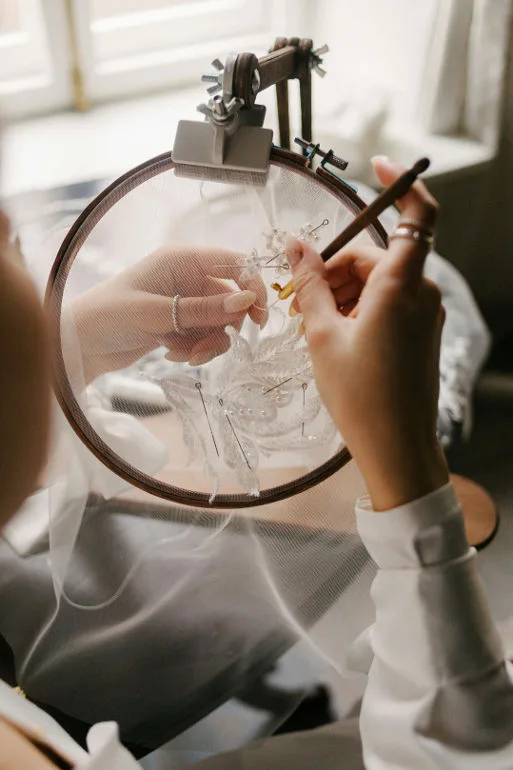
If you know how to embroider, you can bring your cushions to life with aesthetic embroideries, featuring colors and patterns that best suit your home’s decor.
Embroidering a pillow cover is a creative and rewarding process. Follow these steps to embroider your own pillow cover:
Materials Needed for for your DIY Pillow Covers:
- Pillow cover
- Embroidery hoop
- Embroidery floss in desired colors
- Embroidery needles
- Embroidery scissors
- Water-soluble fabric marker or pencil
Instructions:
1) Choose a design: Select a design for your embroidery. This could be a pattern you’ve created yourself or one from a pattern book or online resource.
2) Prepare the pillow cover: Place the pillow cover flat on a smooth surface. If necessary, iron the fabric to remove any wrinkles or creases. Secure the pillow cover in an embroidery hoop, making sure the fabric is taut.
3) Transfer the design: Use a water-soluble fabric marker or pencil to trace the chosen design onto the pillow cover. Make sure the design is centered and positioned where you want it to appear on the pillow cover.
4) Thread the needle: Cut a length of embroidery floss, usually around 18-24 inches long, and thread it through the eye of the embroidery needle. You can use all six strands of the embroidery floss for a bold, solid look, or separate the strands for finer detail.
5) Start stitching: Begin embroidering your design using your chosen stitches. Common embroidery stitches include backstitch, satin stitch, chain stitch, and French knot. Refer to embroidery tutorials or books for instructions on how to execute each stitch.
This can take a while, but part of the DIY Home Decor Ideas for Small Spaces takes time. It also saves you money, and you will most likely love it for a very long time
6) Work methodically: Work your way through the design, stitching each element one at a time. Take your time and pay attention to detail to achieve neat and even stitches.
7) Change colors as needed: If your design includes multiple colors, switch to a new color of embroidery floss when necessary. Tie off the ends of the floss securely on the back of the fabric and start stitching with the new color.
8) Finish the embroidery: Once you’ve completed the embroidery, remove the pillow cover from the embroidery hoop and trim any excess fabric around the edges.
9) Wash and press: If you used a water-soluble fabric marker to transfer the design, gently wash the pillow cover to remove any remaining marks. Press the pillow cover with an iron to smooth out any wrinkles and set the embroidery.
10) Insert the pillow: Finally, insert a pillow form or stuffing into the pillow cover and display your beautifully embroidered creation on your sofa, bed, or favorite chair.
Embroidering a pillow cover allows you to add a personal touch to your home decor and showcase your creativity and stitching skills.
Experiment with different designs, colors, and stitches to create unique and stunning embroidered pillow covers.
Gardening for Small Spaces
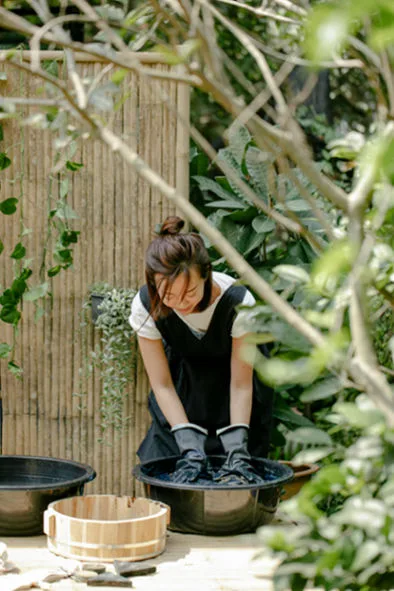
Gardening for small spaces offers numerous benefits, particularly when done oneself.
Firstly, it allows individuals to cultivate greenery and connect with nature, even in limited areas, promoting relaxation and stress reduction.
Additionally, DIY gardening fosters a sense of accomplishment and pride as individuals witness the growth and development of their plants.
When it comes to selecting pots or containers for small spaces, lightweight and versatile options such as hanging planters, vertical gardens, or compact pots are ideal to maximize space utilization.
Utilizing vertical space with wall-mounted planters or tiered shelving can also help make the most of limited space.
As for recommended plants or flowers for small spaces, here are five options:
1) Succulents: These low-maintenance plants come in various shapes and sizes, making them perfect for small spaces. They require minimal watering and can thrive in containers of different shapes and sizes.
2) Herbs: Culinary herbs like basil, parsley, mint, and rosemary are well-suited for small gardens and can be grown in compact pots or hanging planters. Not only do they add flavor to dishes, but they also provide aromatic foliage and visual interest.
3) Pothos (Epipremnum aureum): Pothos is a versatile and easy-to-care-for vine that thrives in low light conditions. Its trailing growth habit makes it perfect for hanging baskets or shelves, adding a touch of greenery to vertical spaces.
4) Peace Lily (Spathiphyllum): Peace lilies are elegant flowering plants known for their air-purifying qualities and low light tolerance. They produce beautiful white flowers and lush foliage, making them an excellent choice for brightening up small indoor spaces.
5) Spider Plant (Chlorophytum comosum): Spider plants are resilient and adaptable, making them suitable for beginners and small spaces alike. They produce long, arching leaves with small white flowers, adding a touch of freshness to any room.
3 DIY Home Decor Ideas: Wall Decoration
1-Family Photo Galleries: Enhancing Walls and Memories:
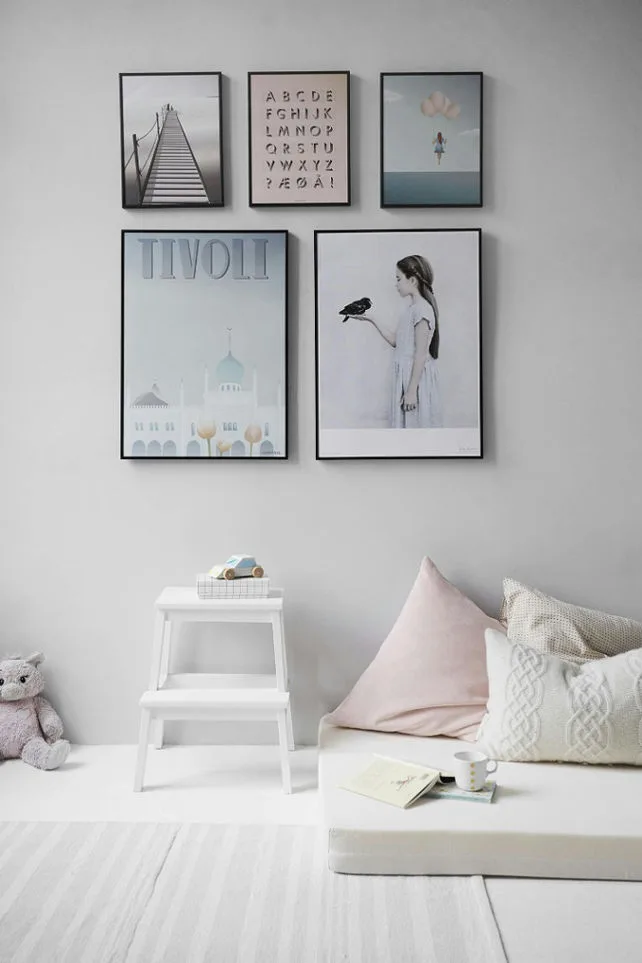
Creating personalized family photo galleries to hang on a wall is a wonderful DIY Home Decor Idea and a way to infuse warmth, character, and personal history into your home decor.
By selecting and arranging cherished photographs of loved ones, special occasions, and memorable moments, you not only beautify your walls but also create a visual narrative that tells the story of your family’s journey together.
When hung on a wall, family photo galleries can have several effects.
Firstly, they serve as focal points that draw attention and add visual interest to the space.
They create a sense of coziness and nostalgia, transforming an ordinary wall into a gallery of treasured memories.
Additionally, strategically arranged photo galleries can help balance the proportions of a room, making it feel more harmonious and inviting.
You can experiment with different layouts, frames, and arrangements to create a gallery that reflects your personality and complements your home decor.
Whether you prefer a sleek and modern look or a more eclectic and bohemian vibe, customizing your photo gallery ensures that it aligns perfectly with your aesthetic vision.
Opting for neutral or light-colored frames can help create a sense of openness and airiness, making the space feel larger and more inviting.
2- Installing Wall Shelves:
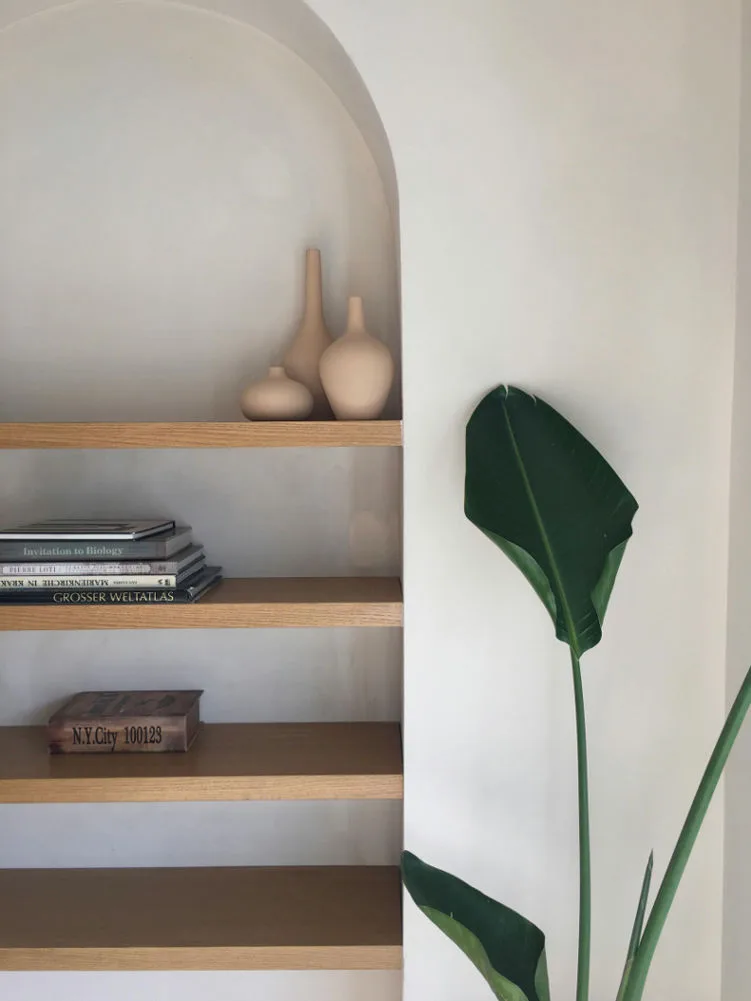
Installing wall shelves offers a myriad of benefits, from creating visual interest to optimizing storage space in your home.
These versatile fixtures not only add depth and dimension to walls but also provide functional surfaces for displaying decorations, storing books, or organizing essentials.
When strategically placed, wall shelves can have various visual effects on a room.
They can serve as focal points, drawing the eye and adding architectural interest to an otherwise plain wall.
Additionally, floating shelves create a sense of openness and airiness, making small spaces appear larger and more spacious.
By choosing shelves with unique shapes, finishes, or arrangements, you can further enhance the aesthetic appeal of your walls and personalize your decor.
Beyond their decorative value, wall shelves offer practical solutions for organizing and optimizing space.
They provide additional surfaces for showcasing decorative items such as framed photographs, artwork, or plants, adding personality and charm to your home.
Moreover, shelves can serve as storage solutions for books, magazines, or other household items, helping to declutter and organize living spaces.
Creating your own wall shelves can be a rewarding and cost-effective DIY project.
With basic tools and materials like wooden planks, brackets, and screws, you can easily construct and install custom shelves to suit your space and style.
Simply measure and cut the wooden planks to the desired length, attach brackets to the wall at the desired height and spacing, then secure the planks onto the brackets using screws.
For a more rustic or industrial look, you can use salvaged wood or metal piping as shelf supports.
Once installed, decorate your shelves with your favorite items to showcase your personality and elevate your home decor.
3- DIY Hand-Painted Murals:

Creating a hand-painted mural in your home is a rewarding and personal way to add a unique touch to your space.
With some basic materials and a bit of creativity, you can transform any wall into a stunning work of art that reflects your style and personality.
To get started, you’ll need a few essential elements.
First, gather your painting supplies, including high-quality acrylic or latex paint, paintbrushes of various sizes, painter’s tape, and a drop cloth to protect your floors and furniture.
You may also want to invest in a projector or grid method to transfer your design onto the wall accurately.
When it comes to finding inspiration for your mural, the possibilities are endless.
Draw inspiration from your interests, hobbies, or travels, or look to nature, architecture, or art for ideas.
Browse through magazines, websites, or social media platforms like Pinterest or Instagram for inspiration and reference images.
Additionally, consider incorporating personal elements such as family portraits, meaningful quotes, or symbols that hold significance to you.
The benefits of creating a hand-painted mural extend beyond mere decoration.
Firstly, it allows you to express your creativity and artistic vision in a tangible and meaningful way, fostering a sense of accomplishment and pride.
Painting can also be a therapeutic and meditative process, providing a much-needed outlet for stress relief and relaxation.
Additionally, a hand-painted mural adds character and personality to your home, serving as a conversation starter and focal point that reflects your individuality.
Storage Tips for Small Spaces
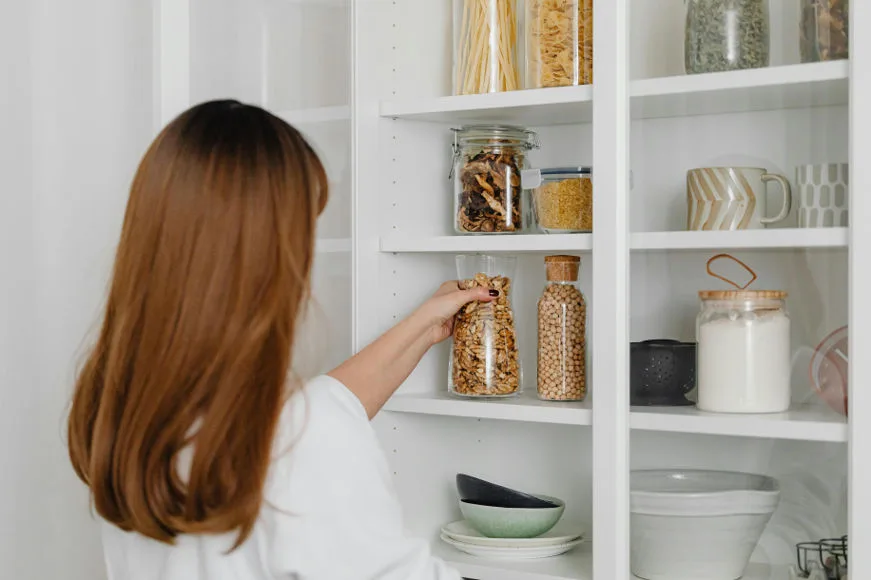
Here are some storage tips for small spaces:
- Utilize vertical space: Install shelves, wall-mounted racks, or hanging organizers to take advantage of vertical wall space and free up floor space.
- Invest in multi-functional furniture: Choose furniture pieces that offer built-in storage solutions, such as beds with drawers underneath, ottomans with hidden storage compartments, or coffee tables with shelving.
- Use storage containers: Invest in bins, baskets, and storage boxes to keep belongings organized and easily accessible. Opt for stackable containers to maximize space in closets or cabinets.
- Declutter regularly: Regularly assess your belongings and declutter items you no longer need or use. Donate or sell items that are taking up valuable space to keep your living area tidy and organized.
- Maximize closet space: Install closet organizers, hanging shelves, or over-the-door organizers to maximize storage space within closets. Use slim hangers to maximize hanging space and consider adding hooks or racks to the inside of closet doors for additional storage.
- Think vertically in the kitchen: Install shelves or racks on the inside of cabinet doors to store spices, cutting boards, or cooking utensils. Use stackable shelves or risers to make the most of cabinet or pantry space.
- Opt for furniture with hidden storage: Choose furniture pieces such as storage benches, side tables with drawers, or console tables with shelves to hide away items while still keeping them easily accessible.
- Maximize under-bed storage: Use under-bed storage containers or bed risers with built-in storage to make use of the space under your bed for storing seasonal clothing, extra bedding, or shoes.
- Go digital: Reduce paper clutter by digitizing documents and photos whenever possible. Store digital files on a computer or cloud storage service to free up physical storage space.
- Keep it organized: Develop a system for organizing your belongings and stick to it. Label storage containers, designate specific areas for different categories of items, and regularly tidy up to maintain a clutter-free living space.
In conclusion, decorating small spaces offers numerous benefits beyond mere aesthetics.
By infusing these areas with personalized touches and DIY home decor ideas for small spaces, individuals can transform them into vibrant and functional areas that reflect their unique personalities and tastes.
Moreover, DIY projects not only allow for creative expression but also empower individuals to optimize space utilization, breathe new life into their surroundings, and cultivate a sense of ownership and pride in their homes.
Ultimately, the process of decorating small spaces DIY-style enhances both the functionality and character of these areas, creating inviting and inspiring environments that are truly one-of-a-kind. For more inspiration, make sure to check out our Pinterest!

